Payment Link Documentation
The BS2 Pay Payment Link is a practical and efficient solution for anyone looking to expand their business into the online world. With BS2 Pay, you can sell your products and services simply and securely, increasing your chances of success in the digital market.
You can sell online even if you don't have an online store and you can offer payment methods such as credit card, debit card and Pix . You can also customize the colors and logos displayed on the payment screen.
Main use cases for the Payments Link:
- Sales on social media: Share the payment link directly in your social media posts to increase your sales.
- Email sales: Include the payment link in your marketing emails to direct your customers to checkout.
- WhatsApp sales: Send the payment link directly to your customers via WhatsApp, making it easier to negotiate and close the sale.
- Sales of services: Use the payment link to receive payments for services rendered, such as consultancies, private lessons, etc.
- Sales of physical products: Create personalized payment links for each product and make it easy for your customers to buy.
- Collecting donations: With a permanent payment link, your organization can offer a way to receive donations of varying amounts.
How to Access The Payment Link Page?
Access the address you were given to log in.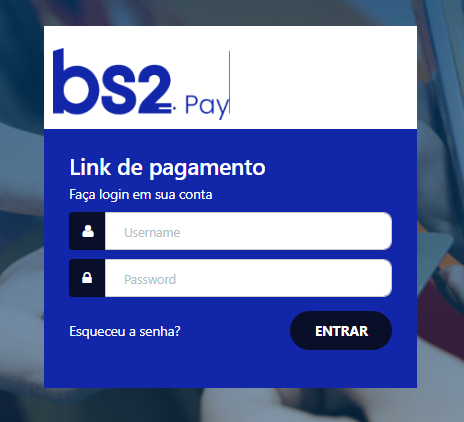
How to Create a Payment Link?
We're going to show you how to create payment links and make them available on your sales channels. You can share this link in different ways such as social networks, email, SMS or WhatsApp and Telegram.
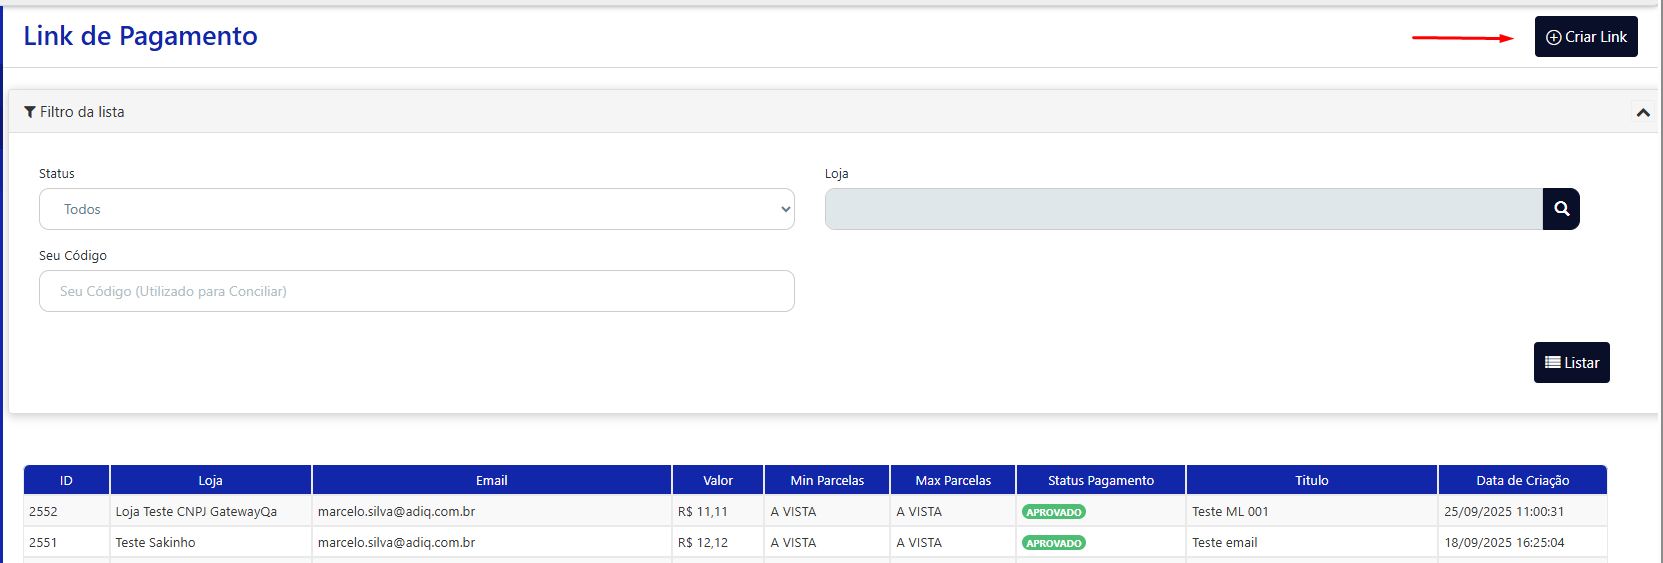
After logging in, in the menu on the left you should click on “Payment” and then in the top right corner on the “+Criar Link” button.
After that, the screen where you indicate the details of this payment link will be displayed.
Here is a description of each of the fields.
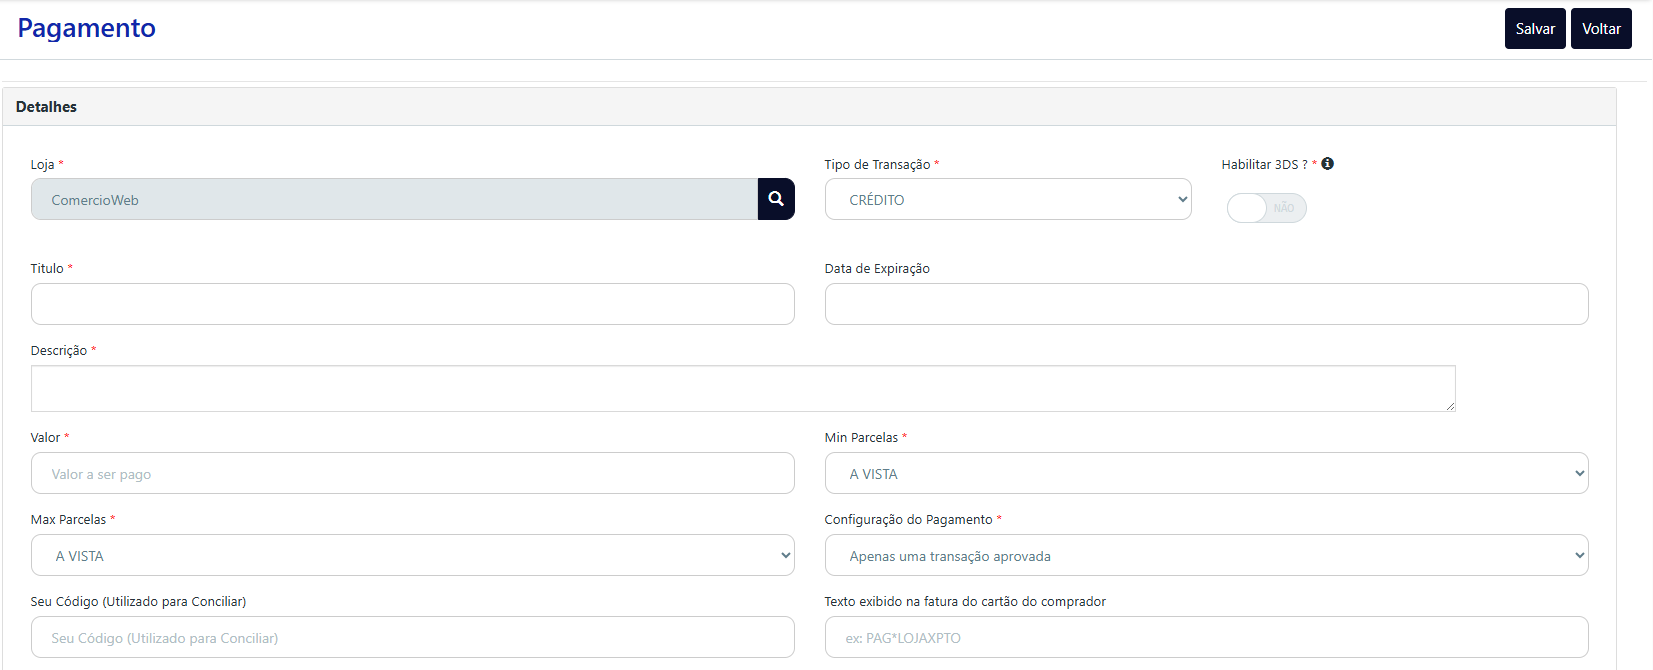

Details
| Field Name | Description | Mandatory? |
|---|---|---|
| Store | Define which of the stores to which you have access will create the link | Yes |
| Transaction Type | Payment methods available: - CREDIT - DEBIT - PIX | Yes |
| Enable 3DS? | Enables 3DS 2.0 authentication option for credit and/or debit | Yes for debit, optional for credit |
| Title | Name to identify the payment | Yes |
| Expiration Date | Defines how long that payment link will be available for your customers to access | No |
| Description | Brief description of the transaction, e.g. purchase items, name of donation campaign, insurance policy number, etc. | Yes |
| Amount | Amount to be charged in Reais | Yes |
| Min Installments | Minimum number of installments | Yes (CREDIT only) |
| Max Installments | Maximum number of installments | Yes (CREDIT only) |
| Payment Configuration | Options available: - Only one approved transaction - Allows several approved transactions | Yes (CREDIT only) |
| Your Code (Used for Reconciliation) | Code defined by the shopkeeper to reconcile transactions internally | No |
| Text displayed on the purchaser's card bill | Information such as the name of your store, to be displayed on the customer's card bill. E.g.: PAG*LOJAXPTO | No |
Payment Notification
| Field Name | Description | Mandatory? |
|---|---|---|
| Send Email? | If activated, sends the payment link directly to the customer's e-mail address | Yes |
| Email address where the customer will receive the link | Yes (if active) | |
| Customer Name | Name the customer wishes to be called by | Yes (if active) |
How to List The Payment Links Created?
In the menu PAYMENT > Payment you can list all the payment links created for your store. These are the possible statuses:- Active
- Approved
- Canceled
- Deactivated
How to Edit The Payment Links Created?
After listing the payment links you have created in your store, if it is still active, you can edit it. You can do this by clicking on the payment link you want to edit and then on the “Edit” button at the top right of the screen.How to List The Transactions Created?
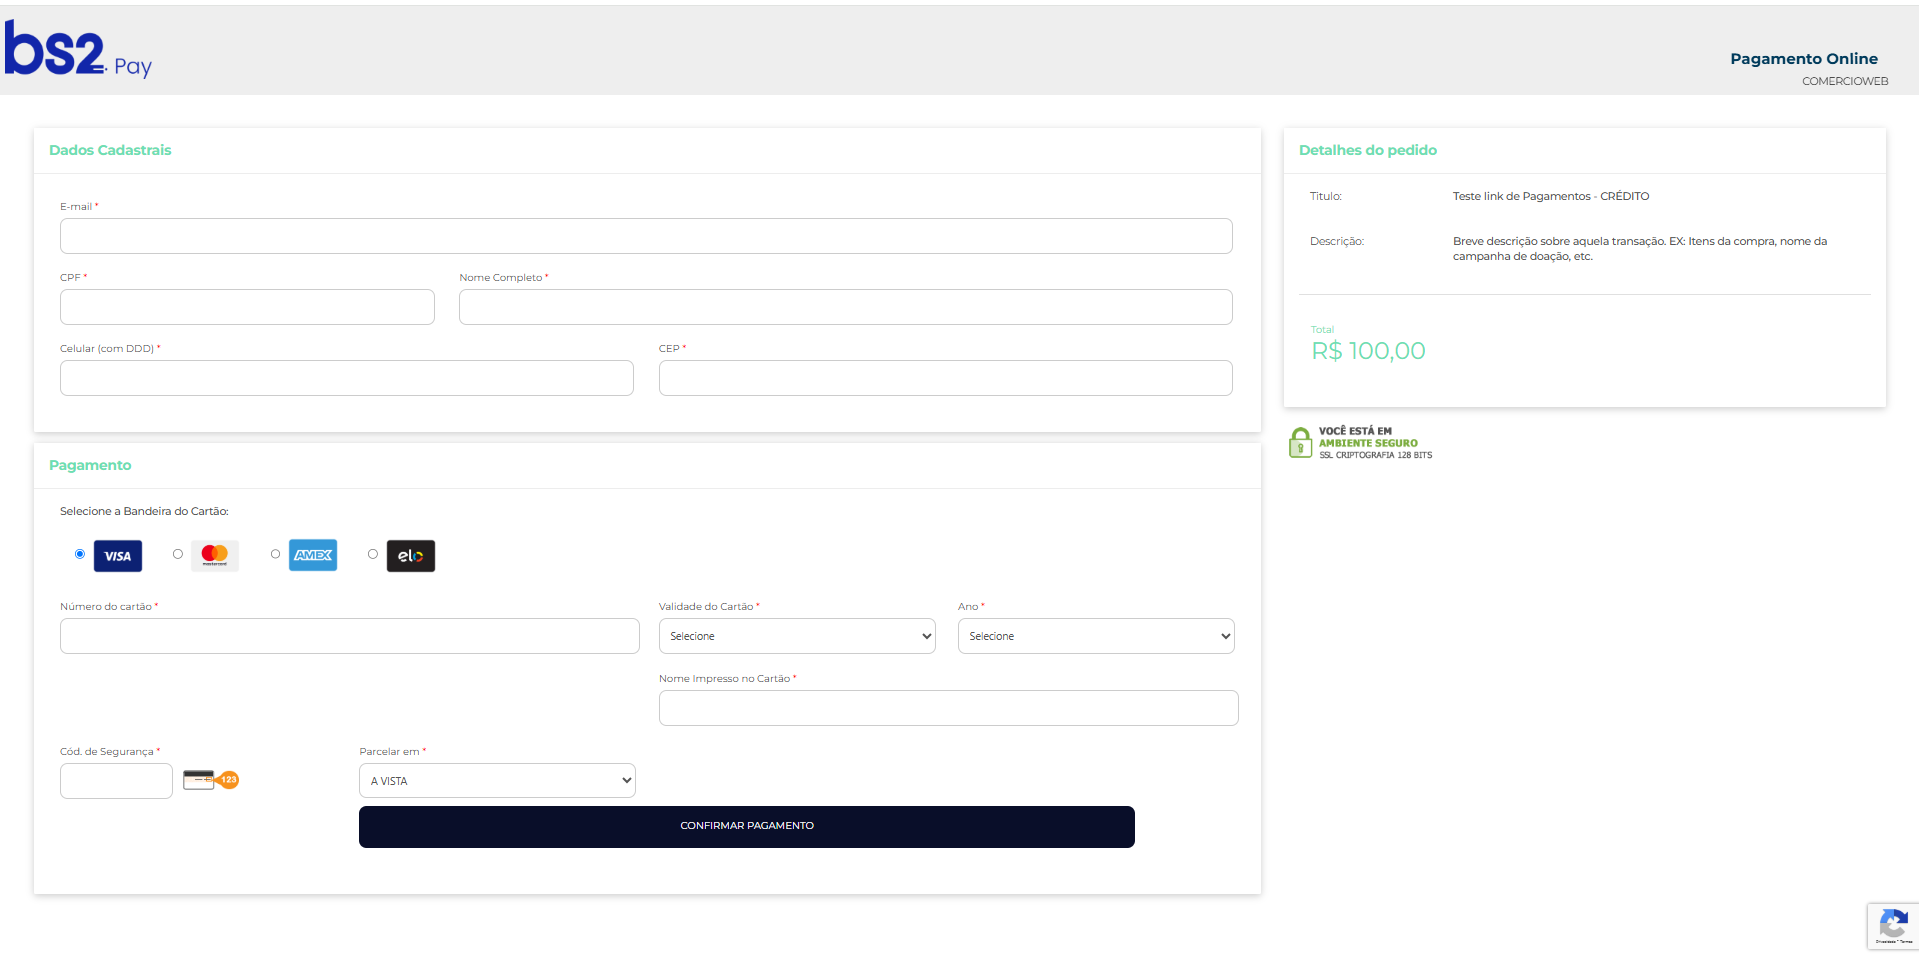
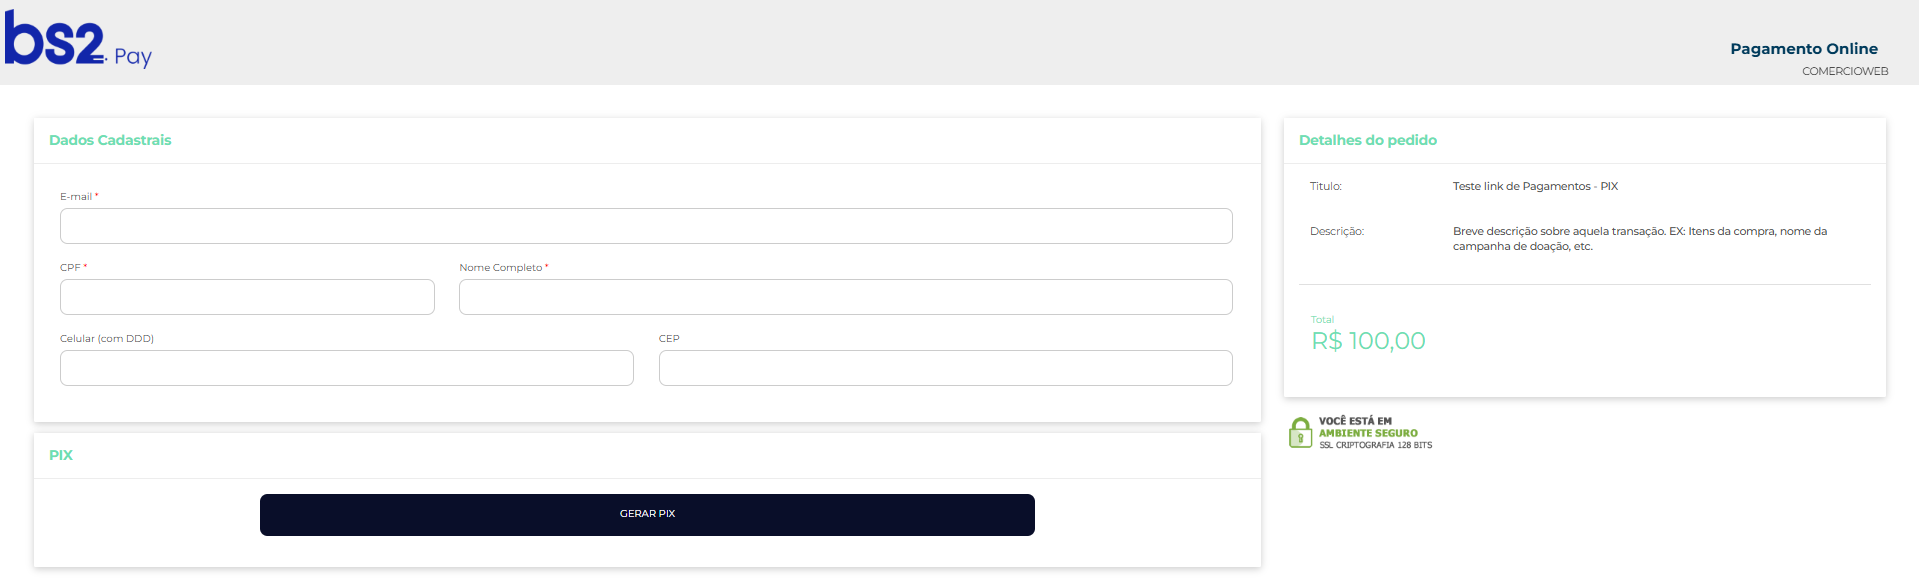
In order to find all the transactions created through your payment links, and find out the status of each one, access the menu PAYMENT > Transaction.Payment Screens
Below, you can see the screen where your customer will pay using your link:Credit/Debit Card
PIX
API Integration
For instructions on generating and managing payment links, please follow the instructions in our documentation in the menu Integrações > API's